Starting Your First Task with PostQode
This quick tour shows how PostQode handles a simple request from start to finish.
After you setting up PostQode and connect an AI provider, follow these steps:
Step 1: Open the PostQode Panel
Click the PostQode icon ( ) in the VS Code Primary Side Bar (vertical bar on the side of the window) to open the chat interface. If you don't see the icon, verify the extension is installed and enabled.
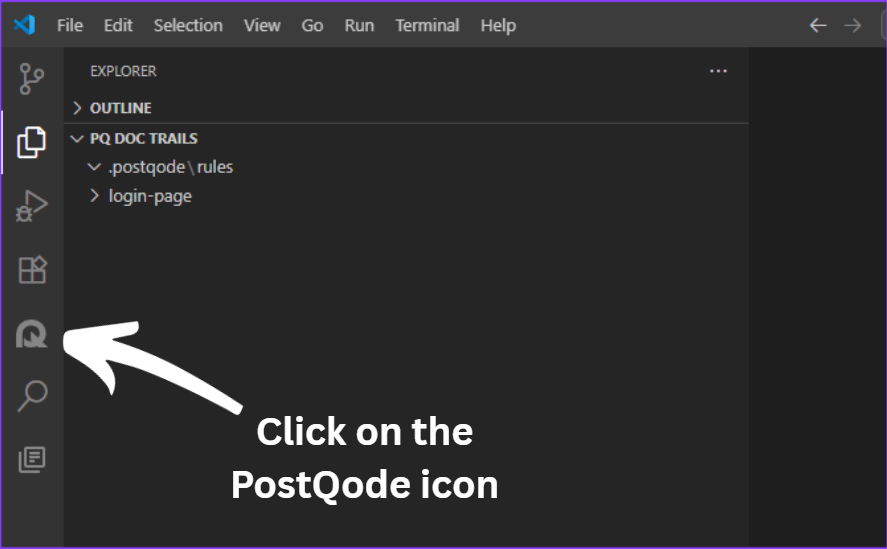
The PostQode icon in the Primary Side Bar opens the chat interface.
Step 2: Understanding the Chat Interface & Controls
Before typing your task, familiarize yourself with the powerful controls located right around the PostQode chatbox:
| Icon / Control | Name | Purpose |
|---|---|---|
| Mode Selector | Plan Mode / Agent Mode | Switch between architectural design (Plan) and autonomous execution (Agent). |
@ Mention | Add Context | Directly reference specific files (@file), folders (@folder), git diffs (@git-changes), IDE problems (@problems), terminal buffers (@terminal), or web links (@url). |
+ Icon | Add Media / Attachments | Attach local screenshots, mockups, or data files directly to the prompt context. |
| Model Switcher | Model Badge | View or quickly switch your active LLM provider and model. |
MCP Servers (🔌) | Manage MCP Servers | Connect external database, GitHub, Jira, or custom Model Context Protocol servers. |
Rules & Workflows (⚖️) | Rules & Workflows | View or configure active .postqoderules and automated multi-step workflows. |
Step 3: Type Your Task
Type a clear, concise description of what you want PostQode to do in the chat box at the bottom of the panel. Examples of effective tasks:
- "Create a file named
hello.txtcontaining 'Hello, world!'." - "Write a TypeScript function that validates email formats with unit tests."
- "Create an HTML file for a simple landing page with dark mode support."
No special commands or syntax needed—just use plain English.
Step 4: Send Your Task
Press Enter or click the Send button to dispatch your prompt.
Step 5: Review and Approve Actions
PostQode analyzes your request and proposes specific actions. These may include:
- Reading files: Shows file contents it needs to access
- Writing to files: Displays a diff with proposed changes (added lines in green, removed in red)
- Executing commands: Shows the exact command to run in your terminal
- Using the Browser: Outlines browser actions (click, type, etc.)
- Asking questions: Requests clarification when needed to proceed
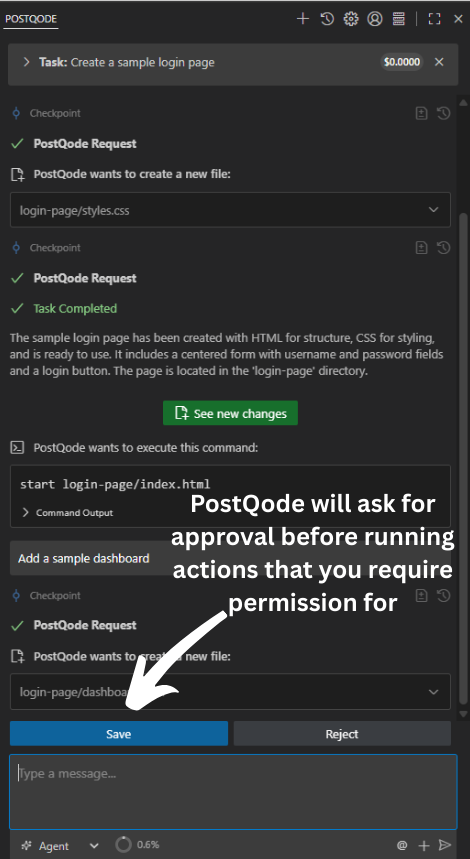
PostQode shows exactly what action it wants to perform and waits for your approval.
The level of autonomy is configurable, allowing you to make the agent more or less autonomous.
You can learn more about using modes
Step 6: Iterate
PostQode works iteratively. After each action, it waits for your feedback before proposing the next step. Continue this review-approve cycle until your task is complete.
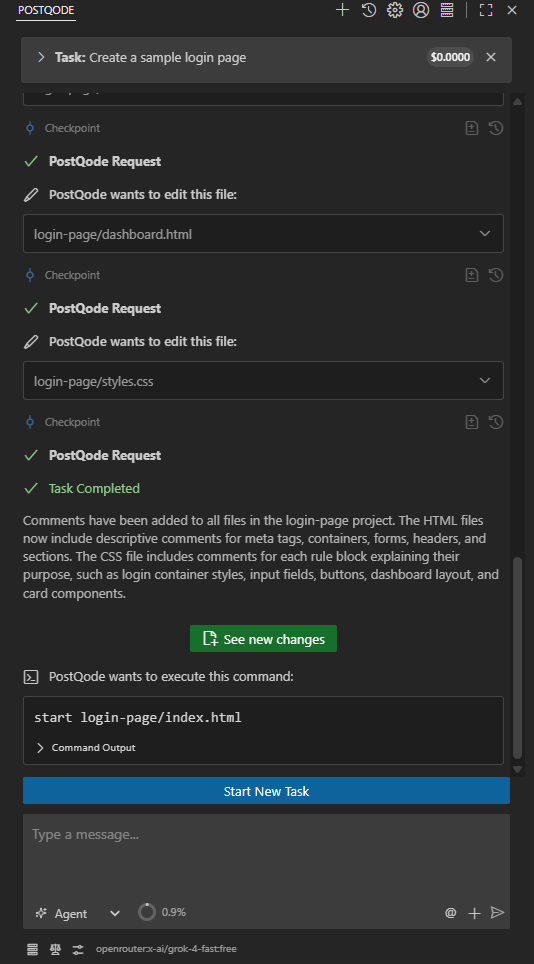
After completing the task, PostQode shows the final result and awaits your next instruction.
Conclusion
You've completed your first task. Along the way you learned:
- How to interact with PostQode using natural language
- Why approval keeps you in control
- How iteration lets the AI refine its work
Ready for more? Explore different modes