Checkpoints
Checkpoints automatically save snapshots of your workspace after each step in a task. This feature lets you track changes, roll back when needed, and experiment confidently with your code.
How Checkpoints Work
PostQode creates a checkpoint after each tool use (file edits, commands, etc.). These checkpoints:
- Work alongside your Git workflow without interference
- Maintain context between restores
- Use a shadow Git repository to track changes
For example, if you're working on a feature and PostQode makes multiple file changes, each change creates a checkpoint. This means you can review each modification and, if needed, roll back to any point without affecting your main Git repository.
Viewing Changes & Restoring
After each tool use, you can:
- Click the "Compare" button to see modified files
- Click the "Restore" button to open restore options

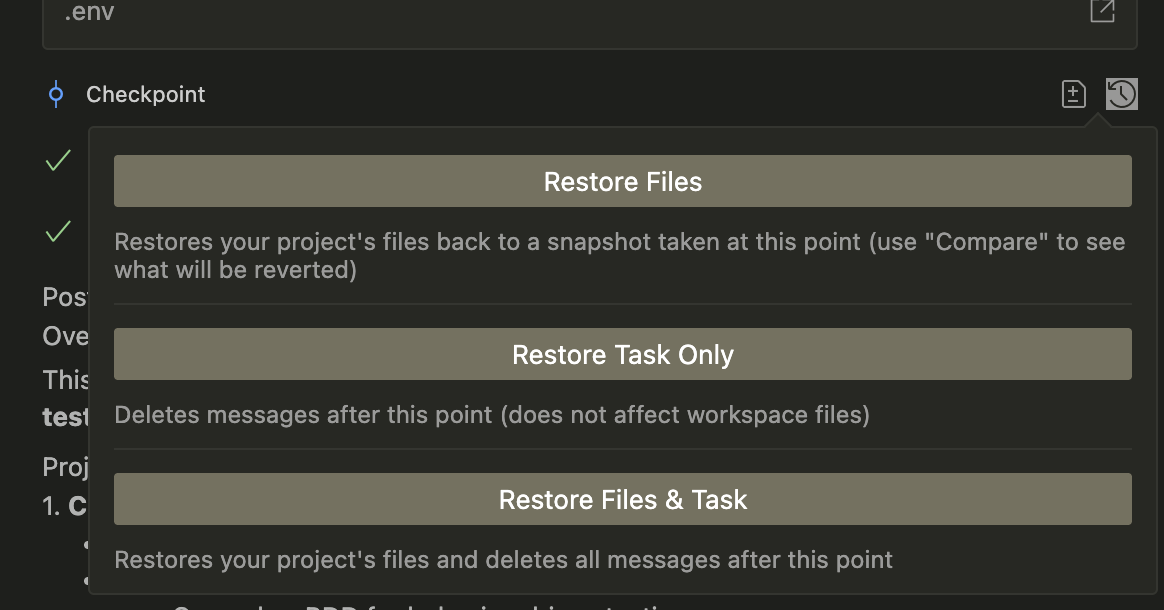
Restore Options
To restore to a previous point:
- Click the "Restore" button next to any step
- Choose from three options:
- Restore Files & Task: Reset both files and task to that point
- Restore Task Only: Keep file changes but revert task context
- Restore Files: Reset files while preserving task context
Example: If PostQode makes changes you don't like while styling a component, you can use "Restore Files" to revert the code changes while keeping the conversation context, allowing you to try a different approach.
Reverting both codebase and task to before any changes were made to start fresh
Use Cases
Checkpoints let you be more experimental with PostQode. While human coding is often methodical and iterative, AI can make substantial changes quickly. Checkpoints help you track these changes and revert if needed.
Using Auto-Approve Mode
- Provides safety net for rapid iterations
- Makes it easy to undo unexpected results
Testing Different Approaches
- Try multiple solutions confidently
- Compare different implementations
- Quickly revert to working states
- Ideal for exploring different design patterns or architectural approaches
Best Practices
- Use checkpoints as safety nets when experimenting
- Leverage auto-approve mode more confidently, knowing you can always roll back
- Restore selectively based on needs:
- Use "Restore Files & Task" for a fresh start
- Use "Restore Task Only" to try different prompts, but keep file changes
- Use "Restore Files" to attempt different implementations while preserving conversation context
Deleting Checkpoints
You can delete all checkpoints by using the "Delete All History" button in the task history menu. Note that this will also delete all tasks. Checkpoints are stored in VS Code's globalStorage.